
Crochet rattle ball


One of Munchkin's favourite toys, ever since we bought it for her when she was just 6 weeks old, is a soft ball made of cotton that has a bell in it. It was fabulous as all the seams are on the outside and she could grab, throw and play with it very easily. And as she's grown, she's continued to enjoy it. Almost every day it gets launched across the room or skittles over the floor, tinkling as it goes.

I've a couple of friends who are pregnant and so I went to buy some to give as gifts. Only to discover that they no longer make them. So I took this as a sign that I should change the pattern, make it a whole heap more colourful and get crocheting! The only down side is that Munchkin has discovered them and now thinks that they're hers. It looks like I'll be making some more!

I started this pattern in much the same way as I did the crochet baby noise makers. By filling a Kinder Surprise cylinder with popping corn kernels and taping it firmly closed. But you can use film canisters, small take away sauce tubs, anything that you can tape closed and that makes a good rattling noise. Or you could even recycle the rattle or bell out of an old baby toy.

Then you get crocheting! I used a 3.5mm hook and 100% cotton. Just check the hook size nominated on your yarn and adjust the hook size appropriately. You don't want large holes in your work so that little fingers can't pry out the stuffing.

Crochet Rattle Ball Pattern
Stitches you need to know:
Chain = ch
Double Crochet = dc
Single Crochet = sc
Increase (2 single crochet in the same stitch) = inc
Materials
Cotton yarn in at least two colours
3.5mm crochet hook
Cotton wadding (using this instead of normal stuffing makes it much harder for little fingers to get at it, but either will work fine).
Plastic container insert from a Kinder Surprise or alternate small plastic container that you can seal.
Seeds, Grains etc
Pattern
In yarn colour 1
Row 1: Create a Magic Ring and sc 10. Pull magic ring closed. Sl st in first dc, to join. (10)
Row 2: ch 2. dc inc 10. Sl st in second ch, to join. (20)
Row 3: ch 2. *dc 1, dc inc 1.* Repeat *to* 10 times. Sl st in second ch, to join. (30)
Change yarn to second highlight colour
Row 4: ch 2. *sc 2, dc inc 1.* Repeat *to* 10 times. Sl st in second ch, to join. Fasten off and sew in the ends. (40)
Repeat 12 times to make 12 circles.
Stitching below the last row of crochet using the holes in the crochet with a large needle. Stitch two circles together, using the increased stitches as a guide. Stitch between 2 sets of increased stitches as shown below.

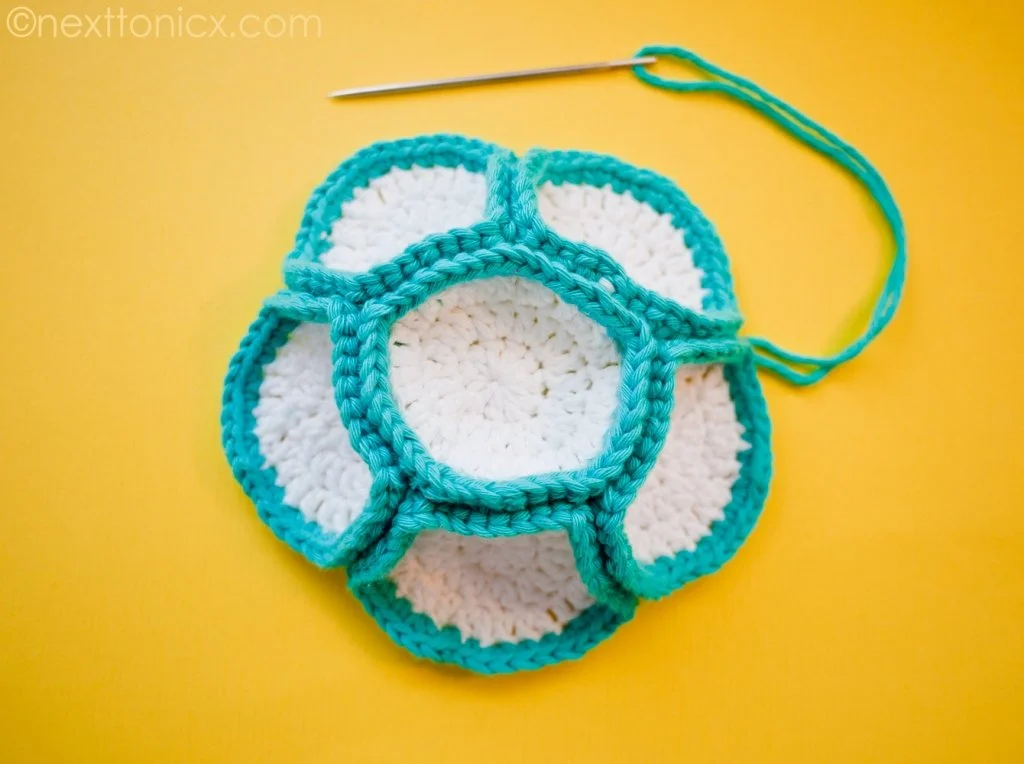
Repeat with 4 following circles until your work looks like the image below. You need to stitch the sides together too, using the increased stitches as a guide again. Finish off and sew in your ends.
Repeat the above steps with your six remaining circles until you have two ball halves.
Taking the two ball halves, align the middle increased stitch on the open end of a circle with a seam on the opposing ball half. Sew together, leaving enough open to insert the filling.
Then, wrap the shaker egg in wadding until it's the size you want and push it in. This item is nice for younger children with less wadding making it softer and less likely to roll away. It also makes it much easier to grasp. For older children, you can make it firmer and the ball will roll if pushed.
Finally, sew the remaining open portion together with the wadding and shaker inside. Finish of and sew in your ends.
I hope your little ones enjoy it as much as Munchkin!